
Something for on-site,
Tier I or Level 1
This is the initial support level responsible for basic customer issues. It is synonymous with first-line support, level 1 support, front-end support, support line 1, and various other headings denoting basic level technical support functions. The first job of a Tier I specialist is to gather the customer’s information and to determine the customer’s issue by analyzing the symptoms and figuring out the underlying problem.[5] When analyzing the symptoms, it is important for the technician to identify what the customer is trying to accomplish so that time is not wasted on “attempting to solve a symptom instead of a problem.” [5] Once identification of the underlying problem is established, the specialist can begin sorting through the possible solutions available. Technical support specialists in this group typically handle straightforward and simple problems while “possibly using some kind of knowledge management tool.” [6] This includes troubleshooting methods such as verifying physical layer issues, resolving username and password problems, uninstalling/reinstalling basic software applications, verification of proper hardware and software set up, and assistance with navigating around application menus. Personnel at this level have a basic to general understanding of the product or service and may not always contain the competency required for solving complex issues.[7] Nevertheless, the goal for this group is to handle 70%-80% of the user problems before finding it necessary to escalate the issue to a higher level.[7]
Tier II or Level 2
This is a more in-depth technical support level than Tier I containing experienced and more knowledgeable personnel on a particular product or service. It is synonymous with level 2 support, support line 2, administrative level support, and various other headings denoting advanced technical troubleshooting and analysis methods. Technicians in this realm of knowledge are responsible for assisting Tier I personnel solve basic technical problems and for investigating elevated issues by confirming the validity of the problem and seeking for known solutions related to these more complex issues.[7] However, prior to the troubleshooting process, it is important that the technician review the work order to see what has already been accomplished by the Tier I technician and how long the technician has been working with the particular customer. This is a key element in meeting both the customer and business needs as it allows the technician to prioritize the troubleshooting process and properly manage his or her time.[5] If a problem is new and/or personnel from this group cannot determine a solution, they are responsible for raising this issue to the Tier III technical support group. In addition, many companies may specify that certain troubleshooting solutions be performed by this group to help ensure the intricacies of a challenging issue are solved by providing experienced and knowledgeable technicians. This may include, but is not limited to onsite installations or replacements of various hardware components, software repair, diagnostic testing, and the utilization of remote control tools used to take over the user’s machine for the sole purpose of troubleshooting and finding a solution to the problem.[5][8]
Tier III or Level3
This is the highest level of support in a three-tiered technical support model responsible for handling the most difficult or advanced problems. It is synonymous with level 3 support, back-end support, support line 3, high-end support, and various other headings denoting expert level troubleshooting and analysis methods. These individuals are experts in their fields and are responsible for not only assisting both Tier I and Tier II personnel, but with the research and development of solutions to new or unknown issues. Note that Tier III technicians have the same responsibility as Tier II technicians in reviewing the work order and assessing the time already spent with the customer so that the work is prioritized and time management is sufficiently utilized.[5] If it is at all possible, the technician will work to solve the problem with the customer as it may become apparent that the Tier I and/or Tier II technicians simply failed to discover the proper solution. Upon encountering new problems; however, Tier III personnel must first determine whether or not to solve the problem and may require the customer’s contact information so that the technician can have adequate time to troubleshoot the issue and find a solution.[7] In some instances, an issue may be so problematic to the point where the product cannot be salvaged and must be replaced. Such extreme problems are also sent to the original developers for in-depth analysis. If it is determined that a problem can be solved, this group is responsible for designing and developing one or more courses of action, evaluating each of these courses in a test case environment, and implementing the best solution to the problem.[7] Once the solution is verified, it is delivered to the customer and made available for future troubleshooting and analysis.
Tier IV or Level4
While not universally used, a fourth level often represents an escalation point beyond the organization. This is generally a hardware or software vendor. Within a corporate incident management system it is important to continue to track incidents even when they are being actioned by a vendor and the Service Level Agreement (or SLA) may have specific provision for this.
Tuesday, October 13, 2009

Tuesday, September 8, 2009
Web-Service
Web Services
What is Web Service? – It’s an solution for cross platform Data exchange leveraging power of SOAP to achieve easy interoperability.
Download presentation for basic fundamentals, examples & execution flow from below location.
http://sites.google.com/site/abhishekgondalia/Home/WebServicesin30mins.ppt?attredirects=0
Web Services has tremendous industry acceptance and hence there are high end tools available for effective development. We use Apache Axis 1.4
How to publish:
- 1. It starts with web.xml, add axis servlet and namespace url mapping (if it doesn’t exists).
- 2. Update server-config.wsdd file (located under same parent as web.xml), add your service specific configurations
- a. Service configuration
- b. Operation’s configuration (if any)
- c. Type mappings (add exchanged Class’s configurations in request & response)
- 3. access server url (server_url/services/MyService?wsdl)
- 4. Update wsdl file if arrays are used
- 5. update service configuration and add updated wsdl file (placed in local workspace)
- 6. Service class should follow naming conventions given in presentation
How to consume WS:
- 1. Get wsdl file or wsdl file url from publisher
- 2. Run WSDL2Java tool which will generate client stubs
Sample WSDL Command: java -classpath .; org.apache.axis.wsdl.WSDL2Java -p com.csam.google -o .\Client_Stubs -t http://api.google.com/GoogleSearch.wsdl NOTE: "-t" option will create default TestCase for the service.
Security Aspect
- Checklist:
- 1. Rename AxisServlet & namespace (update web.xml)
- 2. Stop Service Listing (set global configuration "axis.enableListQuery" as "false")
- 3. Switch Axis to Deployment mode (set global configuration "axis.development.system" as "false")
- 4. Stop providing autogenerated wsdl (set <wsdlFile></wsdlFile> in each service configuration )
- 5. Remove all unnecessary Servlets of Axis from production system (default Axis configuration contains Servlet for Admin Monitoring & others. make sure only AxisServlet is there in web.xml)
Also refer http://ws.apache.org/axis/java/security.html
Monitoring SOAP Packets MyEclipse provides 'TCP/IP Monitor' - One can use this as proxy and can view exact data getting exchanged. This is not specific to SOAP, any activity can be applied by this proxy and can be monitored.
How to work with Arrays in AxisIts kind of work around that we have taken to deal with arrays in Axis, As of now there is no other way identified for the same.
<theatre>
<movies>
<movie>
<name>Hero</name>
<description>The story</description>
</movie>
<movie>
<name>Heroin</name>
<description>Same story</description>
</movie>
<movies>
</theatre>
Class Structure
class Theatre {
Movies movies;
}
class Movies {
Movie[] movie;
}
class Movie {
String name;
String description;
}
Default WSDL Generated by AXIS:
<complexType name="Movies">
<sequence>
<element name="name" nillable="true" type="xsd:string"/>
<element name="description" nillable="true" type="xsd:string"/>
</sequence>
</complexType>
<complexType name="Movies">
<sequence>
<element name="movie" nillable="true" type="impl:ArrayOf_tns1_Movie"/>
</sequence>
</complexType>
<complexType name="ArrayOf_tns1_Movie">
    <sequence>
     <element maxOccurs="unbounded" minOccurs="0" name="movie" type="tns1:Movie"/>
    </sequence>
   </complexType>
<complexType name="ArrayOf_tns1_Movie">
<sequence>
<element maxOccurs="unbounded" minOccurs="0" name="movie" type="tns1:Movie"/>
</sequence>
</complexType>
Update as:
Update as:
<complexType name="Movies">
<sequence>
<element name="name" nillable="true" type="xsd:string"/>
<element name="description" nillable="true" type="xsd:string"/>
</sequence>
</complexType>
<complexType name="Movies"> <sequence> <element maxOccurs="unbounded" minOccurs="0" name="movie" type="tns1:Movie"/> </sequence> </complexType>
References:
- Courtesy: Pathik Dave
- [http://ws.apache.org/axis/java/user-guide.html ]
- [http://www.w3schools.com/webservices/default.asp]
Sunday, April 5, 2009
COD signing
We need to obtain a signing key from Blackberry portal (https://www.blackberry.com/SignedKeys/) and install it to signing machine. Obtaining signing keys takes minimum 48 hours. Once obtain the signing key follow below steps.
Note: Once signing key is installed on one machine, it cannot install on other machine. You can still sign document from another.
Register for a RIM Signing Authority account
You must have HTTP access to the Internet to register for code signing
Note: Once signing key is installed on one machine, it cannot install on other machine. You can still sign document from another.
Register for a RIM Signing Authority account
You must have HTTP access to the Internet to register for code signing
1. Save the .csi files that RIM e-mails you. The .csi file contains a list of signatures and your registration information.
2. Double-click the one of the .csi file.
3. Double-click a .csi file.
If a dialog box as below appears that states that a private key cannot be found, perform the following actions before you continue:

- Click Yes to create a new key pair file.
- Type a password for your private key, and retype to confirm and Click OK.
- Move your mouse to generate data for a new private key.

4. In the Registration PIN field, type the PIN that RIM provided.
 5. In the Private Key Password field, type a password of at least eight characters. This is your private key password, which protects your private key.
Note: Protect your private key password. If you lose this password, you must register with RIM again. If this password is stolen, contact RIM immediately.
6. Click Register.
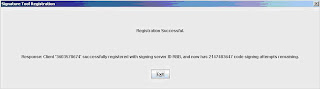
7. Click Exit.
5. In the Private Key Password field, type a password of at least eight characters. This is your private key password, which protects your private key.Note: Protect your private key password. If you lose this password, you must register with RIM again. If this password is stolen, contact RIM immediately.
6. Click Register.
7. Click Exit.
Friday, April 3, 2009
SFTP using SSh: Key pair generation
ssh (SSH client) is a program for logging into a remote machine and for executing commands on a remote machine. It is intended to replace rlogin and rsh, and provide secure encrypted communications between two untrust-ed hosts over an insecure network. X11 connections and arbitrary TCP ports can also be forwarded over the secure channel.
ssh-keygen generates, manages and converts authentication keys for ssh(1). ssh-keygen can create RSA keys for use by SSH protocol version 1 and RSA or DSA keys for use by SSH protocol version 2. The type of key to be generated is specified with the -t option. If invoked without any arguments, ssh-keygen will generate an RSA key for use in SSH protocol 2 connections.
Normally this program generates the key and asks for a file in which to store the private key. The public key is stored in a file with the same name but ``.pub'' appended. The program also asks for a passphrase. The passphrase may be empty to indicate no passphrase (host keys must have anempty passphrase), or it may be a string of arbitrary length. A passphrase is similar to a password, except it can be a phrase with a se-ries of words, punctuation, numbers, whitespace, or any string of charac-ters you want. Good passphrases are 10-30 characters long, are not simple sentences or otherwise easily guessable (English prose has only 1-2 bits of entropy per character, and provides very bad passphrases), andcontain a mix of upper and lowercase letters, numbers, and non-alphanu-meric characters. The passphrase can be changed later by using the -p option.
Option argument :
-t type
Specifies the type of key to create. The possible values are
``rsa1'' for protocol version 1 and ``rsa'' or ``dsa'' for proto-
col version 2.
Steps:
1. Run "ssh-keygen -t dsa", two files will be generated: id_dsa.pub and
id_dsa.
2. Run ssh-keygen -e -f id_dsa > SSH_id_dsa.pub
SSH_id_dsa.pub file than can be send to the remote place with which you are going to communicate.
ssh-keygen generates, manages and converts authentication keys for ssh(1). ssh-keygen can create RSA keys for use by SSH protocol version 1 and RSA or DSA keys for use by SSH protocol version 2. The type of key to be generated is specified with the -t option. If invoked without any arguments, ssh-keygen will generate an RSA key for use in SSH protocol 2 connections.
Normally this program generates the key and asks for a file in which to store the private key. The public key is stored in a file with the same name but ``.pub'' appended. The program also asks for a passphrase. The passphrase may be empty to indicate no passphrase (host keys must have anempty passphrase), or it may be a string of arbitrary length. A passphrase is similar to a password, except it can be a phrase with a se-ries of words, punctuation, numbers, whitespace, or any string of charac-ters you want. Good passphrases are 10-30 characters long, are not simple sentences or otherwise easily guessable (English prose has only 1-2 bits of entropy per character, and provides very bad passphrases), andcontain a mix of upper and lowercase letters, numbers, and non-alphanu-meric characters. The passphrase can be changed later by using the -p option.
Option argument :
-t type
Specifies the type of key to create. The possible values are
``rsa1'' for protocol version 1 and ``rsa'' or ``dsa'' for proto-
col version 2.
Steps:
1. Run "ssh-keygen -t dsa", two files will be generated: id_dsa.pub and
id_dsa.
2. Run ssh-keygen -e -f id_dsa > SSH_id_dsa.pub
SSH_id_dsa.pub file than can be send to the remote place with which you are going to communicate.
Sunday, March 22, 2009
Code Signing: Windows
Below link provides straight foraward, easy steps for cab file signing for windows application.
Windows signing by verisign
Windows signing by verisign
Sunday, March 15, 2009
Code Signing: Java application Part-1
First of all sorry for the format of this document.
Each of the mobile platform has a code signing process that will verify that the mobile application is authentic. The objective of code signing is to ensure that mobile applications is well trusted, virus-free, and traceable to the company.
Each of the mobile platform has a code signing process that will verify that the mobile application is authentic. The objective of code signing is to ensure that mobile applications is well trusted, virus-free, and traceable to the company.
Verisign ACS (Authenticated Content Signing) Portal issues certificates for various mobile platforms. It has a good diagram on how mobile code signing works:

These instructions provide an overview of obtaining and using Sun Java signing and a
VeriSign Digital Certificate. The steps covered here are using the command promt utility. Other way around is to used J2ME's Utility for MIDLet signing if you are signing an j2me application.
- Download the Java 2 SDK.
The Java2 SDK for all platforms is available free of charge from java.sun.com.
We will be using the following tools to apply for your VeriSign Code Signing Digital Certificate and sign your code: keytool, jar, and jarsigner. - Generate a public/private key pair.
If you are novice (like i was before starting my first code signing task), i recommend you read my another blog entry to get know how of security terms like keypair, keystore and etc. Enter the following code, specifying an alias for your keystore, to generate a public/private key pair:
C:\> C:\jdk1.3\bin\keytool -genkey -keyalg rsa -alias MyCert
In this string, the keystore alias is MyCert and algorithm used is RSA.
Keytool responds with prompts to enter a password for your keystore and your name,
organization, and address information. The public/private key pair generated by keytool is saved to your keystore and will be used to sign Java applets and applications.
Note: Your private key is never sent to VeriSign, so if you lose it, you will be unable to sign code. If your private key is lost or stolen, please contact VeriSign to cancel your certificate. - Generate a certificate signing request (CSR).
Enter the following code to generate a CSR:
C:\>C:\jdk1.3\bin\keytool -certreq -alias MyCert
In this string, keytool is requested to create a CSR for the key pair in the keystore MyCert.
After prompting you to enter the password for your keystore, keytool will generate a CSR
similar to the following:
-----BEGIN NEW CODE SIGNING ID REQUEST-----
MIIBtjCCAR8CAQAwdjELMAkGA1UEBhMCVVMxCzAJBgNVBAgTAkNBMRIwEAYDVQQHE
wlDdXBlcnRpbm8xGTAXBgNVBAoTEFN1biBNaWNyb3N5c3RlbXMxFjAUBgNVBAsTDU
phdmEgU29mdHdhcmUxEzARBgNVBAMTClN0YW5sZXkgSG8wgZ8wDQYJKoZIhvcNAQE
BBQADgY0AMIGJAoGBALTgU8PovA4y59eboPjY65BwCSc/zPqtOZKJlaW4WP+Uhmeb
E+T2Mho7P5zXjGf7elo3tV5uI3vzgGfnhgpf73EoMow8EJhly4/YsXKqeJEqqvNog
zAD+qUv7Ld6dLOv0CO5qvpmBAO6mfaI1XAgx/4xU/6i6u6TLLOvgv9pMNUo6v1qB0
xly1faizjimVYBwLhOenkA3Bw7S8UIVfdv84cO9dFUGcr/Pfrl3GtQ==
-----END NEW CODE SIGNING ID REQUEST-----
This string is an example of a CSR generated using keytool. A CSR contains a copy of the requestor’s public key and a hash of the data entered in step 2 signed with the requestor’s private key.
Copy the CSR and paste it into the VeriSign Sun Java Code Signing Digital Certificate application form, accessible at
http://www.verisign.com/products/signing/index.html.
When your request is approved, VeriSign attaches your Sun Java Code Signing Digital
Certificate to your confirmation email.
Upon receipt, the attached certificate is saved to a file on your computer.
A digital certificate is a “trust path” or “chain” back to the VeriSign root certificate. This trust path enables your code to be validated on any standard JRE without installing any additional files. Note: VeriSign takes a number of steps to verify your identity. For commercial publishers, VeriSign does a considerable amount of background checking. As a result, it will take approximately 3-5 business days to verify your information and issue a certificate. - Import your Digital Certificate.
Enter the following code, with the path to your certificate, to import the chain into
your keystore.
C:\>C:\jdk1.3\bin\keytool -import -alias MyCert -file ABhiNew.cer
In this string, keytool is requested to import the Digital ID “ABhiNew.cer” into the
keystore MyCert. - Bundle your applet into a Java Application Resource (JAR) file.
Use jar to bundle your applets or applications as a JAR file.
C:>C:\jdk1.3\bin\jar cvf C:\TestApplet.jar
This string creates a JAR file “C:\TestApplet.jar.” The JAR file contains all the files under the current directory and its subdirectories.
JAR responds with:
added manifest
adding: TestApplet.class (in = 94208) (out= 20103)(deflated 78%)
adding: TestHelper.class (in = 16384) (out= 779)(deflated 95%) - Sign your applet.
Use jarsigner to sign the JAR file, using the private key you saved in your keystore.
C:\>C:\jdk1.3\bin\jarsigner C:\TestApplet.jar MyCert
At the prompt, enter the password to your keystore. Jarsigner hashes your applet or application and stores the hash in the JAR file created in step 5 with a copy of your certificate.
Verify the output of your signed JAR file.
C:>C:\jdk1.3\bin\jarsigner -verify -verbose -certs d:\TestApplet.jar
This string verifies that the files have been saved to the JAR file and that the signature is correct.When the signed JAR file is downloaded, the JRE displays your VeriSign Digital Certificate to the user. If the file is tampered with in any way after it has been signed, the user will be notified and given the option of refusing installation.
Some of the really good links i would like to share here are:
http://java.sun.com/javame/reference/docs/sjwc-2.0-web/docs/ToolsGuide-html/jadtool.html
http://www.spindriftpages.net/blog/dave/2006/06/18/midlet-jar-signing-a-tutorial-revised/
Monday, October 13, 2008
Object Orientation (Chap-2) goes smoothly as well.
Object Orientation goes smoothly as well.
Cool. It didn't take much time to complete the chapter. It was
interesting. Nothing new was there, but was testing the awareness
around java world. Exam was good i think for chapter 2. I scored 11
out of 14. Chapter 3 looks lenghty but got a week to do it. So
chill out.
Cool. It didn't take much time to complete the chapter. It was
interesting. Nothing new was there, but was testing the awareness
around java world. Exam was good i think for chapter 2. I scored 11
out of 14. Chapter 3 looks lenghty but got a week to do it. So
chill out.
Monday, October 6, 2008
Chap1: Declaration and access control
Many of my new book kick off lasted for first chapter only. For example when I started reading “hibernate in action“, “webwork in action“, “ejb in action”, I was hardly able to close first chapter. But this time I’m firm. More determinant than ever. My other blog (http://abhi-java.blogspot.com) is also starving of new article.
As the names suggest the whole chapter was about pretty simple basic java stuff. But guess what? My test was horrible. I could solve only 5 out of 10 questions correctly. Anyways next chapter is due by coming Monday. So I got 2.5 days to finish the chapter. By finish I don’t mean to go through all pages but going through them from top to bottom At least next exam should score at least 80%.
As the names suggest the whole chapter was about pretty simple basic java stuff. But guess what? My test was horrible. I could solve only 5 out of 10 questions correctly. Anyways next chapter is due by coming Monday. So I got 2.5 days to finish the chapter. By finish I don’t mean to go through all pages but going through them from top to bottom At least next exam should score at least 80%.
Saturday, August 16, 2008
Friday, July 18, 2008
Java refactoring Part-3
The creation of a good mental model is one of the key challenges in developing software. One way to build this model is by giving good names to your code. People should code not only for themselves but also for others as well.
I took interview yesterday for placement in my compnay. A saw the an answer given by a candidate as "Understanding code of others" in reply to the question " what do you hate most about software industry?".
Can you believe it how disgusting it feels when you read a bad code. Anyways not going further i've discussed some smells related names and refactoring for them in below presentation.
Click here to start presentation --> Measured Smells & Names
Subscribe to:
Posts (Atom)
